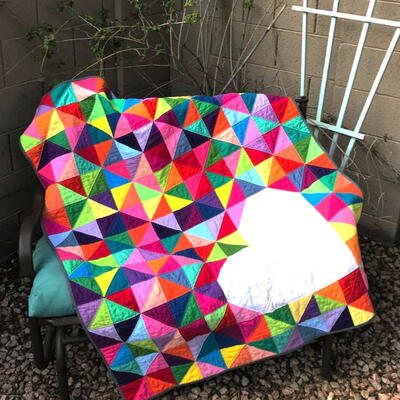
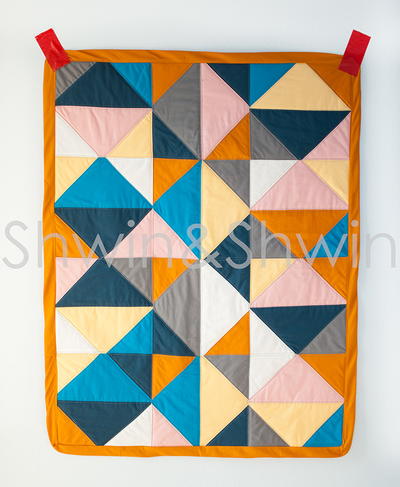
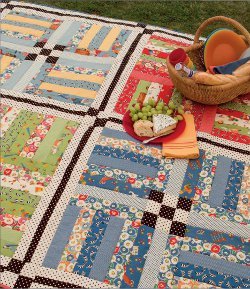
Sea Glass Beach Quilt Pattern

The Sea Glass quilt pattern embodies the essence of summer, capturing the tranquil beauty of beachside treasures. Soft hues reminiscent of seafoam green, aquamarine, and sandy beige dance across the quilt, evoking the calming rhythm of ocean waves. Delicate curves and flowing lines mimic the organic shapes of seashells and sea glass scattered along the shore. Each quilt block is a mosaic of textures and tones, like pebbles glistening in the sunlight. Whether draped over a seaside picnic or adorning a cozy beach house, the Sea Glass quilt brings the warmth of summer and the serenity of the sea into any space.
MaterialsFabric

Materials List
-
Items:
- Fabric A: Kona Cotton Sky – 1 yard
- Fabric B: Kona Cotton Azure – 1 yard
- Fabric C: Kona Cotton Glacier – ¾ yard
- Fabric D: Kona Cotton Aqua – 1 yard
- Fabric E: Kona Cotton Capri – ¾ yard
- Fabric F: Kona Cotton Leaf – ¾ yard
- Backing – 2 ½ yards
- Binding – ½ yard
- Batting – 2 ½ yards
- Coordinating thread
- Basic sewing and quilting supplies
-
Machine and accessories:
- MC15000
- 1/4 “ seam foot O
- AcuFeed Flex Dual Feed Foot
INSTRUCTIONS
Cutting:

Making the blocks:
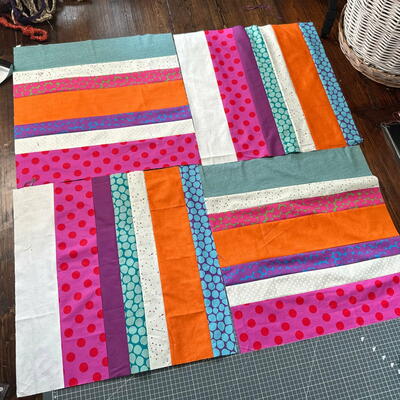
Note: Each block has a “mirrored block”. For example, for each Block A in the diagram there is a mirror image Block A elsewhere in the quilt.
Block A: Half Square Triangle (HST)
Note: This method makes two matching HST.
-
Draw a diagonal line across the back of one of the 7” squares.
-
Place on top of another 7” square matching colors according to the diagram.
-
Stitch using a scant ¼” seam with the ¼” seam foot along either side of the diagonal line and cut apart on the marked line.
-
Press squares open and trim to 6 ½” x 6 ½”.

Block B: Half Square Triangle Stripe
-
Make two HST using the method for Block A.
-
Place one of the small 3 ½” x 3 ½” squares on one corner of the quilt using the diagram to match colors.
-
Stitch on the marked line.
-
Trim the corner ¼” from the stitched line and press open.

Block C: Quarter Square Triangle
-
Lightly starch the triangles (cut from the 7 ½” x 7 ½” squares) before sewing to help eliminate stretching. Stitch two sets of triangle pieces along the long edge to form two HST according to the colors shown in the diagram and press open.
-
Draw a diagonal line across the back of one of the HST that is perpendicular to the stitching line.
-
Align the HST by nesting the seams and stitch using a scant ¼” seam with the ¼” seam foot along either side of the diagonal line and cut apart on the marked line.
-
Press squares open and trim to 6 ½” x 6 ½”.

Block D: Half Square and Quarter Square Triangle Combination
-
Lightly starch the triangles (cut from the 7 ½” x 7 ½” squares) before sewing to help eliminate stretching. Stitch two triangle pieces along the long edge according to the colors shown in the diagram and press open.
-
Draw a diagonal line across the back of one of the 7” x 7” squares.
-
Place the 7” x 7” square on top of the pieced square with the diagonal line opposite of the stitched line, ensuring the corners of the solid square align with the seam line of the pieced square.
-
Stitch using a scant ¼” seam with the ¼” seam foot along either side of the diagonal line and cut apart on the marked line.
-
Press open and trim to 6 ½” x 6 ½”.

Piecing and quilting:
-
Piece all blocks, and then sew blocks into rows. Sew rows to complete the quilt top.
-
Baste the top, batting and backing together to form a quilt sandwich.
• Suggested quilting: horizontal lines using an elongated serpentine stitch to look like ripples in water. Use AcuFeed Flex Dual Feed Foot to quilt. Use the edge of the foot as a guide for stitching.
To create the stitch:
a. Press the program key.
b. Select quilting stitch 8.
c. Change the stitch length to 2.5.
d. Select quilting stitch 8.
e. Change the stitch length to 3.5 -
Your project is finished! If you love this tutorial, be sure to check out Janome.com for even more inspiration.


Read NextScrappy Summer Quilt