Easy to Sew Market Tote
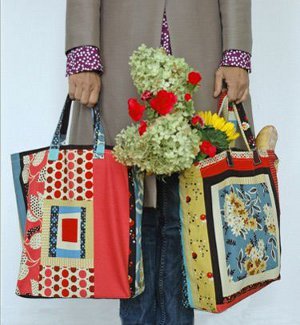
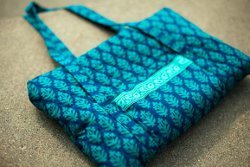
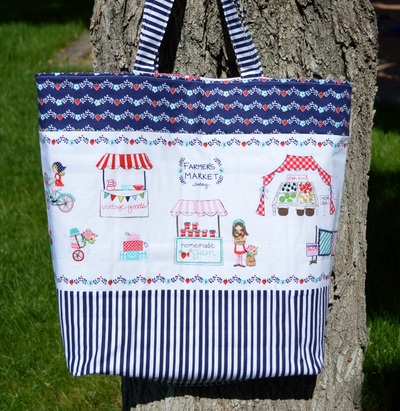
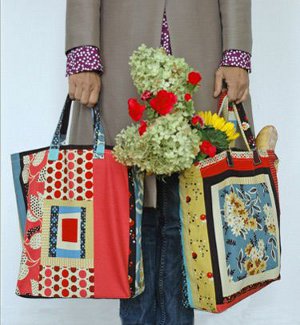
Sew a reusable quilted tote instead of using one more plastic bag! This easy to sew market tote by Denyse Schmidt of Denyse Schmidt Quilts uses Patchwork Promenade cheater cloth canvas fabric from her County Fair line, but any sturdy canvas fabric will work. The 54"-wide canvas showcases printed "pieced" blocks so there's no piecing required. Isn't cheater's cloth great?
Size:
The finished bag will be 12" wide x 14" tall x 4" deep.
Materials:
- 1/2 yd. 54"-wide canvas fabric cheater cloth (Patchwork Promenade from the County Fair line from FreeSpirit Fabrics--no longer available for order, check your local shop or online sources)
- Sewing thread
- Sewing machine
- Scissors or rotary cutter, cutting mat, and clear plastic ruler
Terms:
Double-Turn Hem: Turn raw edge under a scant 1/4", then turn under a generous 1/4". Sew a straight stitch
through both layers, backstitching at the beginning and end of the seam. Press the finished edges.
Edgestitch: Stitch about 1/8" or closer from the finished edge.
Topstitch: The topstitch is used to secure seams and add a decorative finish. This stitch is worked on the right
side, about 1/4" away from an edge or seam, though all the layers.
SA = Seam allowance
![]()
Instructions:
- Cut the Fabric: Cut a 17" x 35.75" rectangle of canvas fabric. If using Denyse’s Patchwork Promenade, cut a piece one quilt square wide by two tall (note that the quilt squares on the cheater cloth are not exactly square, the 17" side runs parallel to the selvage). From the remaining fabric, cut two pieces 17” x 4” for the handles, and one piece 7" x 17" for an inside pocket (optional).
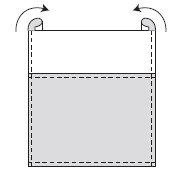 Sew the Pocket: On one short end create a double-turn hem (see glossary, above). Fold up hemmed side, with wrong sides together, so rectangle measures 9" x 7". Finish long sides by stitching a double-turn hem on the raw edges of both sides of the pocket, folding the fabric toward the back (figure A, right). Set aside.
- Sew the Tote: Fold tote fabric in half, with right sides together, so fabric measures 17-7/8" x 17". The fold will become the bottom of the bag. Using a 1/2" SA, sew both sides. With bag wrong side out, sew a line of topstitching, 1/4" from the side seam. You’ll be sewing on the right side of the bag, from the inside. Don’t worry if your machine can’t reach the corner, just get as close as you can.
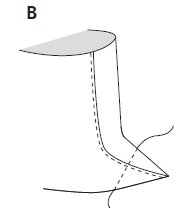 Lay bag flat on a table and finger press the bottom fold as a guide for the next step. Wrong side out, stand bag upright and flatten the bottom corners, being careful to line up the side seams with the bottom center of the bag. Sew a 4" line of stitching across the triangle, 2" in from the corner of the bag (figure B, right). Repeat on other side. This creates the bottom of the bag. Press triangle to the bottom of the bag, and stitch in place, across the point.
- Turn bag right side out. Fold top of bag to inside 1/2", then another 1". Press. Pin prepared pocket in place underneath the fold, lining up the center of one side of the bag with the center of the pocket. Finish the top of the bag by stitching along the folded edge, attaching the pocket as you sew.
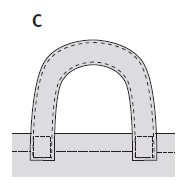 Attach the Handles: Fold under short sides 1/2" each. Press. Fold in long edges so they meet in the center, then fold strap in half. Press. Edgestitch around the strap, about 1/8" from the edge. Repeat for second strap. Pin the ends of each strap to the outside of the bag, 2" from the center and 1-1/2" down, and sew in a box shape to attach (figure C, right). You’re ready to shop and promenade!
All contents ©2009 Denyse Schmidt Denyse Schmidt Designs, LLC. No part of this product may be reproduced in any form unless otherwise stated. Items made from this pattern may not be produced for commercial resale. All rights reserved. Permission has been granted for FaveQuilts.com to post this project.
Read NextQuilt As You Go Initial Tote
Your Recently Viewed Projects
Jenny H
Feb 17, 2017
Just printed this pattern out. It was super easy. I needed something easy and affordable, so this is perfect.
gayleen46 5883740
Jan 18, 2012
Why can't I print the instructions if they are being given free?
JessiCAN
Jan 24, 2012
Thanks for bringing our attention to this issue! We have added a print button to the top of the project so that you can easily print this pattern! -- Editor of FaveQuilts.com
Report Inappropriate Comment
Are you sure you would like to report this comment? It will be flagged for our moderators to take action.
Thank you for taking the time to improve the content on our site.

