Chinese Windows Bed Quilt
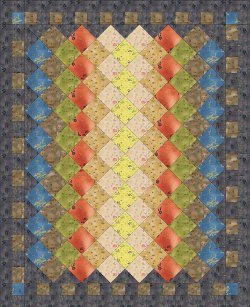
The Chinese Windows Bed Quilt incorporates muted tones into a simple pattern that gives the effect of diamond-patterned stained glass windows. This pattern is for bed quilts, so use it for a bedroom or guest room. Alternately, this pattern would look great as a throw quilt, too. Stitch your eastern-inspired fabrics into a series of triangles and quilt block patterns that create a cascading look once they're all put together. The color scheme of the border gives this quilt the illusion of being woven. This zen quilt pattern is guaranteed to bring good feng shui into your home.
Project TypeMake a Project
Quilt Size62 inches wide x 76 inches long
Time to CompleteA week or two
Primary TechniquePieced

Note: This quilt was designed using fabrics from the Oriental collection from Art Gallery Fabrics. Fabrics are coded in materials list.
MATERIALS:
- Fabric A (Oriental Tabac): 1 yard
- Fabric B (Oriental Sand): 1/2 yard
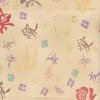
- Fabric C (Oriental Olive): 1/2 yard
- Fabric D (Oriental Lime): 3/8 yard

- Fabric E (Oriental Red): 1/2 yard

- Fabric F (Oriental Black): 2 yds

- Fabric G (Oriental Mustard): 1/2 yard
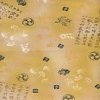
- Fabric H (Oriental Teal): 1/2 yds

- Batting, backing, and binding
INSTRUCTIONS:
Cutting Directions:
For each block cut:
- Fabric A: 18 squares 5-1/2”
- Fabric B: 18 squares 5-1/2”
- Fabric E: 18 squares 5-1/2”
- Fabric C: 16 squares 5-1/2”
- Fabric D: 8 squares 5-1/2”
- Fabric F: 8 squares 8-1/4”. Cut them twice diagonally.
- Fabric G: 16 squares 5-1/2”
- Fabric H: 16 squares 5-1/2”
For the top and bottom borders cut:
- Fabric F: 8 strips 12-7/8” by 3-1/2” and 16 strips 3-5/8” by 3-1/2”
- Fabric A: 16 strips 3-5/8” by 3-1/2”
For the sides borders cut:
- Fabric F: 8 strips 16-3/8” by 3-1/2” and 16 strips 4-1/2” by 3-1/2”
- Fabric A: 16 strips 4-1/2” by 3-1/2”
For the corner unit borders cut:
- Fabric F: 8 strips 6-7/8” by 3-1/2”
- Fabric H: 4 squares 3-1/2”
Block Assembly:
Note: Stitch right sides together and press open after every seam.
- For the first corner, stitch two of the triangles of fabric F together (as shown).

- For the next row, stitch one of the triangles from fabric F with one square from fabric A. Add one square from fabric H. Add another triangle at the end (as shown).

- For the next rows, keep adding squares in the sequence show on the Quilt Diagram.
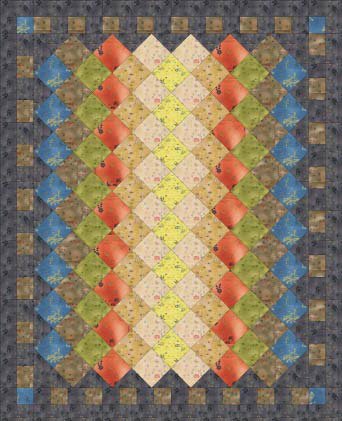
Quilt Top Assembly:
Following the quilt diagram above, start piecing the first row to the second row. Go ahead with the third row and all the remaining rows until you complete all the top. Be careful to match the seams.
Border Assembly:
For the top and bottom borders:
- From the fabrics cut for the top and bottom borders, sew consecutively one rectangle from fabric F, one from A, one from F, and another one from A (as shown below).

- Add one strip from fabric F on top (as shown below). Make 8 units.

For the side borders:
- Proceed in the same way as the other border units. Make 8 units.
For the corner unit borders:
- Sew two strips from fabric F to the square from fabric H. Miter the corners. Make 4 units.
Finally, layer, baste, quilt and bind as desired.
This project is on our list of the 12 Most Popular Free Quilt Patterns of April 2012 and 101+ Best Quilt Patterns for Free: Quilt Block Patterns, Quilt Patterns for Baby, and More!
Read NextCabin Fever Blues Quilt Pattern
Your Recently Viewed Projects
Mckinst 0264450
Feb 10, 2018
I loved making this quilt. Made it in a rag style for a young man. Very easy to make.
Mckinst 0264450
Feb 10, 2018
I loved making this quilt. I made it in to a rag style for a young man . Very easy to make.
cgj 2570022
Jul 05, 2015
Have been trying to find the quilt diagram. Is it the photo of the quilt?
lkallusch 1085753
Jun 25, 2015
I increased it to queen size, added a piano border, used a 'satiny' sheet from Goodwill for backing, and enveloped it for a lighter-weight summer bed cover.
mltorres53 2416161
Jan 10, 2015
Working on this beautiful quilt. Need to work on border now. I would do it again with brighter colors from what I originally picked. One correction "D" should read cut 16, not 8 as it reads. Thank you for sharing all the beautiful patterns!
faigadina 2542302
Jun 10, 2013
I am having difficulty with the corners and the outer strips. I cut the pieces according to the directions, but the pieces I have do not match your picture.
sdsemail 4622725
Apr 11, 2012
My great-great grandmother gave me a quilt top made with this pattern, but it is made from silk that came from my grandmother's dresses. My grandmother passed in 1929 so the quilt top is over 80 years old. Although the material is beginning to fray, it is a treasure to me.
Report Inappropriate Comment
Are you sure you would like to report this comment? It will be flagged for our moderators to take action.
Thank you for taking the time to improve the content on our site.

