Beginner Hourglass Block

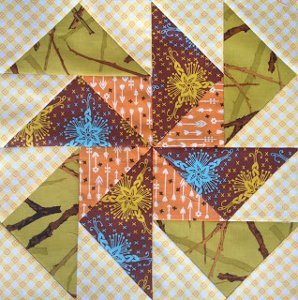
The Hourglass block is a quintessential quilting block, and this free hourglass quilt block pattern is so much fun to make! Just like the Pinwheel block and the Dutch Windmill block, the Hourglass block is ideal for beginners since it comes together easily and quickly. Its classic design offers a versatile foundation for countless quilting projects, allowing you to experiment with various fabric combinations and color schemes. Whether you're crafting a cozy throw or a decorative wall hanging, the Hourglass block promises both simplicity and elegance, making it a delightful addition to any quilter's repertoire.

Project TypeMake a Project
Materials List
-
FABRIC AND NOTIONS REQUIRED
Now, let’s get right to making this block! Like the two previous blocks, the Hourglass block finishes at 12”. Here’s what you’ll need to make it.
- [8] 4” x 4” in background fabric
- [2] 4” x 4” squares in four different colors
INSTRUCTIONS
-
Using this tutorial make four HSTs in each color, for a total of 16 HSTs, four in each color.
-
Start making each hourglass unit by sewing two HSTs together, making sure the HSTs are facing the correct direction. Press seam open or towards the left HSTs.
-
Next, sew the two remaining HSTs together, once again making sure the HSTs are facing the correct direction. Press seam open or towards the right HSTs.
-
Align the two units from Steps 2 and 3 so the middle seams line up, nesting together if seams were pressed to the side. Sew the top unit to the bottom unit. If necessary, trim your block to 6.5” square.
-
Repeat steps 2-4 with remaining colors.
-
Sew full block together with windmill units in a 2 x 2 arrangement. If necessary, trim your block to 12.5” square.
-
Your project is finished! If you love this tutorial, be sure to check out Janome.com for even more inspiration.
Read NextPastel Patchwork Star Block Tutorial


