Spring Breeze 12-Inch Quilt Block Pattern
Spring into this big quilt block pattern!
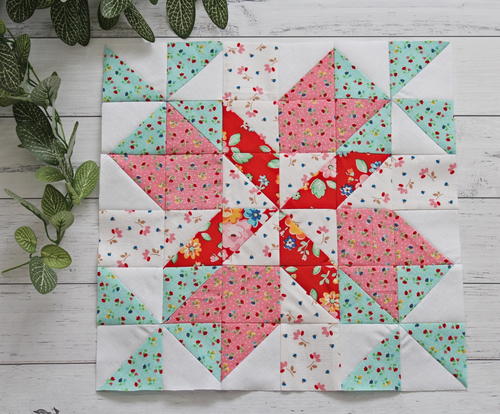
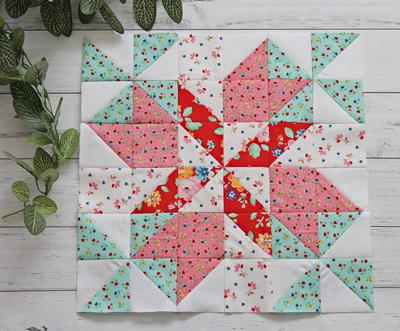
Spring Breeze is a fun and easy 12-inch quilt block pattern that you simply must make! Using gorgeous floral fabrics in our favorite spring hues, Spring Breeze is giving us some serious spring fever! This pretty 12-inch quilt block uses a traditional piecing method that beginners and advanced quilters will love combined with fun HST work that will help you practice the HST quilting method. Make one of these large quilt blocks as a decorative statement piece or create a set that will lay the foundation for a stunning spring quilt pattern you'll be able to display well into the summer months.
Find more pretty patterns from our friend Rose over at her blog, Threadbare Creations.
Click Here to Download the PDF Pattern!
Cutting Requirements
From aqua floral fabric cut:
- 4 x 4 ¼” squares
From low volume floral fabric cut:
- 2 x 4 ¼” squares
- 4 x 2 ½” squares
From red floral fabric cut:
- 2 x 4 ¼” squares
From pink floral fabric cut:
- 2 x 4 ¼” squares
- 4 x 2 ½” squares
Block Construction
- With right side togethers, position a white 4 ¼” square on top of three of the aqua 4 ¼” squares, aligning raw edges and sew across each of the four sides of the three squares using a ¼” seam allowance.
- Cut each square diagonally twice to yield four triangles from each square - twelve triangles in total.
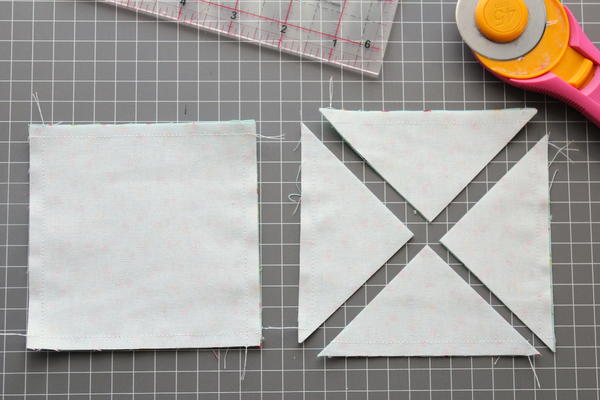
- Open each triangle and press seams towards the aqua triangles. Carefully trim each aqua/white HST unit to 2 ½” square.
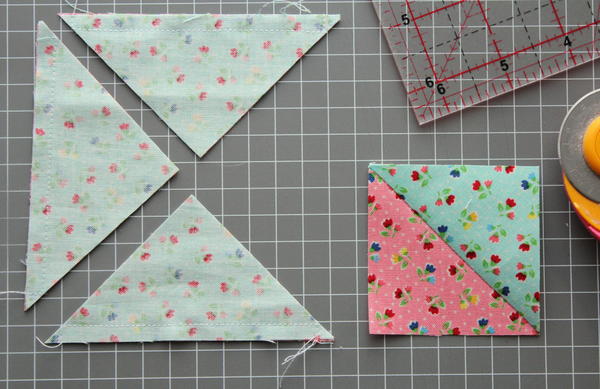
- With right side togethers, position an aqua 4 ¼” square on top of one pink 4 ¼” square, aligning raw edges and sew across each of the four sides using a ¼” seam allowance.
- Cut the square diagonally twice to yield four triangles. Open each triangle and press seams towards the aqua triangles. Carefully trim each aqua/pink HST unit to 2 ½” square.
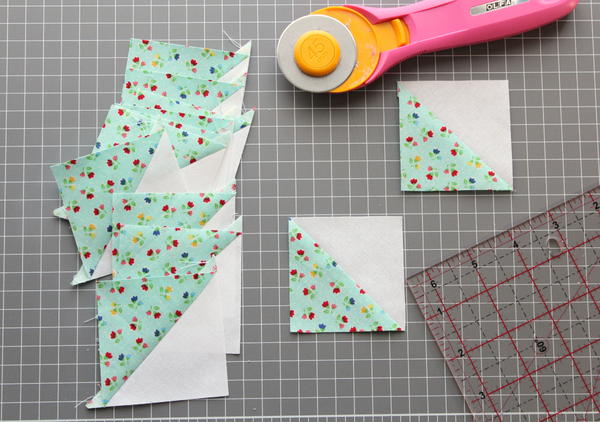
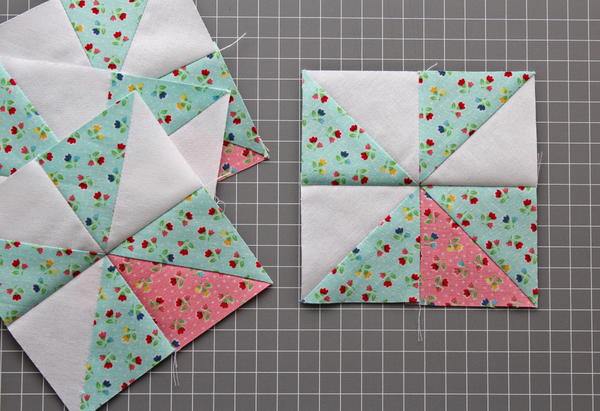
- To make one pinwheel unit, arrange three of the aqua/white HST units and one of the pink/aqua HST units as shown.
- Sew the units together into two rows, pressing seams in alternate directions for nesting.

- Carefully matching all seams, sew the two rows together, pressing seams to the top of the unit for nesting, to yield one pinwheel unit measuring 4 ½” square.
- Sew four of these pinwheel units and keep them aside until required.
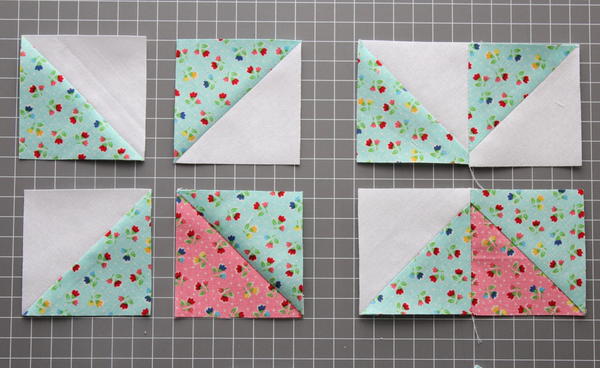
- Carefully matching all seams, sew the two rows together, pressing seams to the top of the unit for nesting, to yield one pinwheel unit measuring 4 ½” square.
- Sew four of these pinwheel units and keep them aside until required.
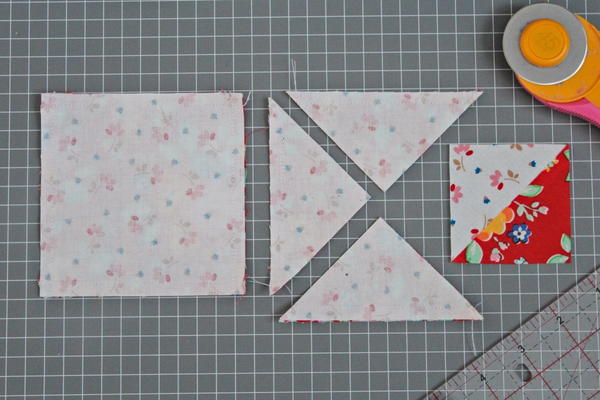
- With right side togethers, position a low volume floral 4 ¼” square on top of each of the two red floral 4 ¼” squares, aligning raw edges and sew across each of the four sides of each square using a ¼” seam allowance.
- Cut each square diagonally twice to yield four triangles from each square – eight triangles in total. Open each triangle and press seams towards the red triangles.
- Carefully trim each low volume/red HST unit to 2 ½” square. Keep four of these HST units aside until required.
- To make the centre pinwheel unit, arrange four of the low volume/red HST units as shown.
- Sew the units together into two rows, pressing seams in alternate directions for nesting.
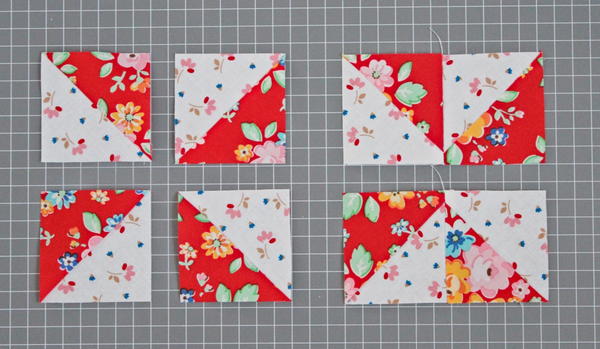
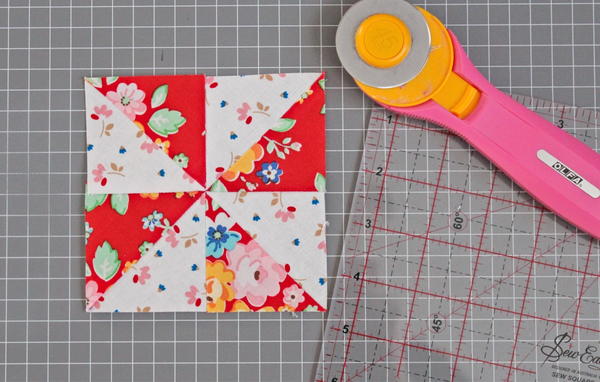
- Carefully matching all seams, sew the two rows together, pressing seams to the top of the unit for nesting, to yield one pinwheel unit which should measure 4 ½” square.
- Keep this unit aside until required.
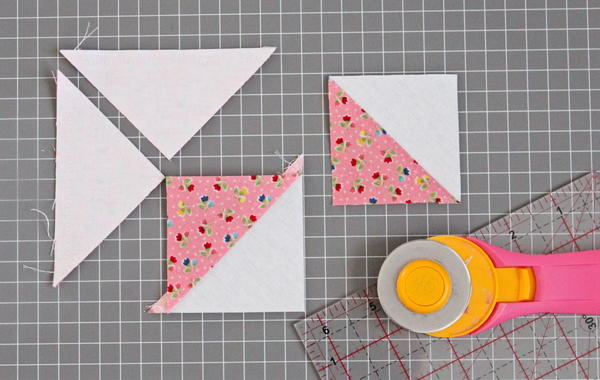
- With right side togethers, position a white 4 ¼” square on top the remaining pink 4 ¼” square, aligning raw edges and sew across each of the four sides of the square using a ¼” seam allowance.
- Cut the square diagonally twice to yield four triangles. Open each triangle and press seams towards the pink triangles.
- Carefully trim each pink/white HST unit to 2 ½” square.
- To make one four patch unit, arrange one pink/white HST unit, one red/floral HST unit and one pink floral and one low volume floral 2 ½” square as shown.
- Sew the units together into two rows, pressing seams towards the squares.
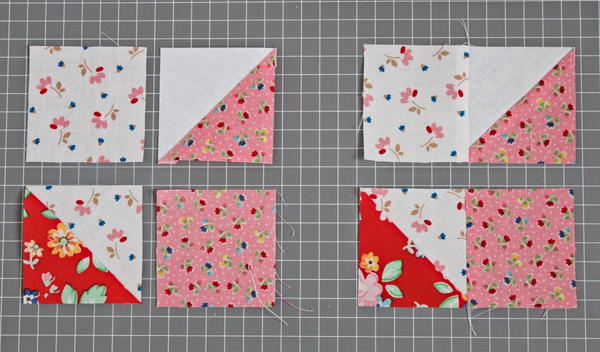
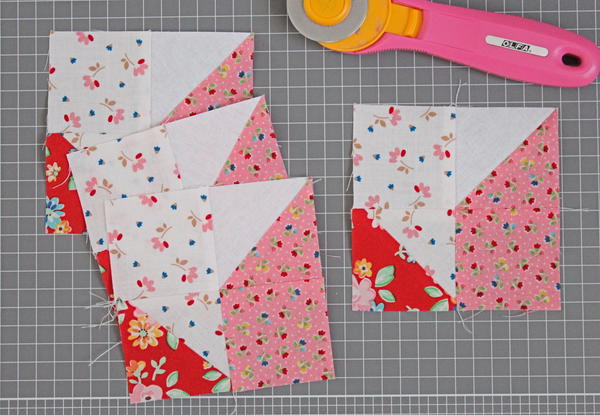
- Carefully matching all seams, sew the two rows together, pressing seams to the bottom of the unit for nesting, to yield one four patch unit which should measure 4 ½” square.
- Sew four of these four patch units.
Diagram
Note: Use the below diagram for orientation of units.
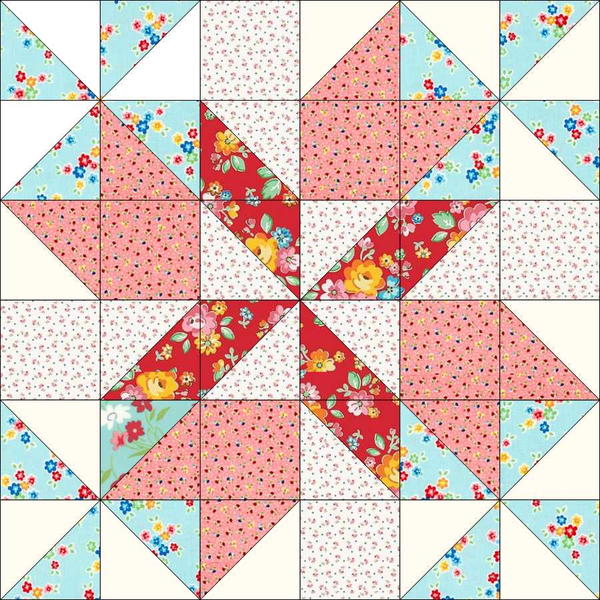
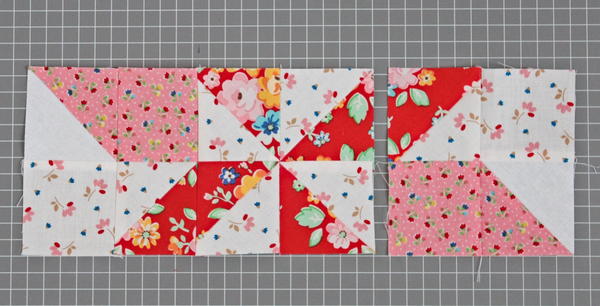
- Carefully matching all seams and ensuring correct orientation of each unit, sew a four patch unit to the either side of the red/low volume pinwheel unit, pressing seams towards the pinwheel unit to complete the centre row.
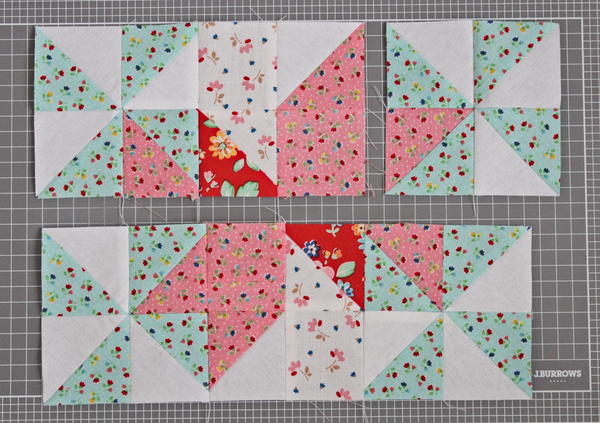
- Carefully matching all seams and ensuring correct orientation of each unit, sew a pinwheel unit to either side of the two remaining four patch units, pressing seams towards the pinwheel units to complete the top and bottom rows.
- Please note the rows are identical in orientation and the bottom row is rotated before attaching to the block.
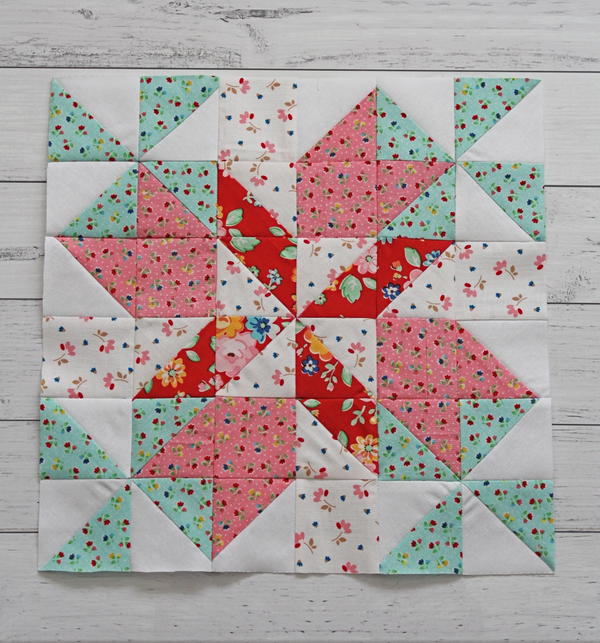
- Carefully matching all seams and ensuring correct orientation of the rows, sew the three rows together, pressing the long seams open to complete your Spring Breeze block which should measure 12 ½” square.
Finished Block
Well done! Your Spring Breeze pattern using traditional piecing is complete!
Share your thoughts in the comments section below and add a picture of your version.
OK! Who else LOVES this amazing pattern from Rose? Let us know your thoughts below!
Read NextTea Towel Quilt Block Tutorial
Your Recently Viewed Projects
KLC
Mar 04, 2020
Love is an understatement. This is STUNNING and I'm OBSESSED! Can't wait to make it to celebrate spring.
Report Inappropriate Comment
Are you sure you would like to report this comment? It will be flagged for our moderators to take action.
Thank you for taking the time to improve the content on our site.

