Pot Holders for Dad
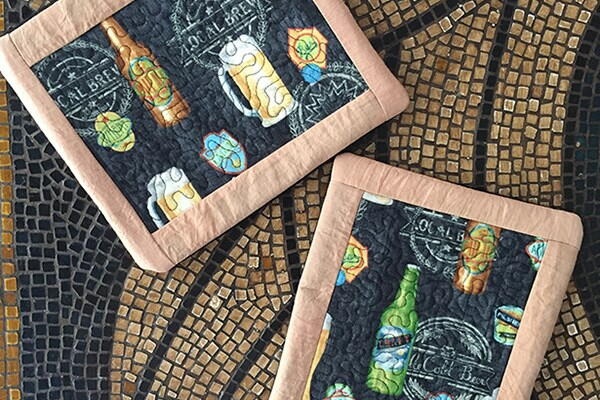
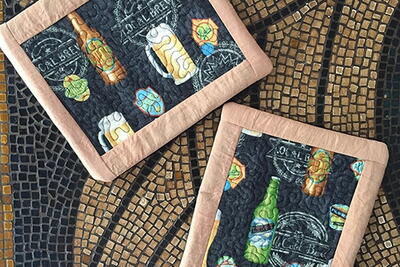
Just in time for Father's Day, enjoy creating these in-the-hoop oversized pot-holders for your craft beer-loving dad! Using the new "Brew House" fabric by artist Paul Brent and distributed by Robert Kaufman, Janome Artisan Milinda Stephenson used her Digitizer software and the large square hoop on her Horizon Memory Craft 15000 to create these quick and easy pot-holders for your grill-loving dad.

HolidayFathers' Day
Materials List
- Download the .JEF file. (Note: Milinda enlarged the file by 12% once she loaded it onto her MC15000.)
- SQ 23 Hoop
- 11" x 12" insul-brite
- 11" x 12" fashion fabric
- Four fabric strips (11" x 3")
- Two pieces of 11" x 12" fabric backing
- 14" tear-away stabilizer
INSTRUCTIONS
Using a 9.1" Squared Hoop:
Hoop Tear-Away Stabilizer:
-
Sew color 1 (square).
-
Place insul-brite in the square.
-
Lay fashion fabric directly on top of the insul-brite.
-
Sew color 1 again to secure the insul-brite and fashion fabric to the stabilizer.
Fabric Frame Top:
-
Sew color 2 (placement line for the fabric frame strip).
-
Lay the fabric piece on top of the line, leaving the overhang below the line.
-
Sew color 3 (sew down the line).
Note: All placement lines are blue and all sew-down lines are green. -
Fold the fabric piece up and finger press.
Fabric Frame Bottom:
-
Sew color 4 (placement line for the bottom strip).
-
Place the fabric strip on the line, leaving the overhang above the line.
-
Sew color 5 (sew-down the line for the bottom fabric frame strip).
Fabric Frame Left Side:
-
Sew color 6 (placement line for the left side of the fabric frame).
-
Place the fabric on top of the placement line with the overhang to the right.
-
Sew color 7 (sew down the line).
-
Fold the fabric back and finger press.
Fabric Frame Right Side:
-
Sew color 8 (placement line).
-
Place the fabric on top of the line with the overhang on the left.
-
Sew color 9 (sew down line).
-
Fold the fabric back and finger press.
Strippling:
-
Sew color 10 (strippling).
Envelope Backing:
-
Place a hemmed backing piece over the top of the pot-holder, right sides together. Move slightly to the left so that the far right final stitching line is at least 1/2" from the hemmed end of the backing piece. You do not want to catch the hemmed end in the final stitching. This will be the top of your envelope backing.
-
Now lay the second piece of the envelope backing on top of the first piece, right side down. The hemmed end of this backing piece should be on the left side of the square. Be certain to leave at least 1/2" between the final stitching line and the hemmed end of your envelope backing.
Sew Down, Remove and Turn:
-
Sew color 11 (this is final sew-down square).
-
Remove the pot-holder from the hoop.
-
Clip to a 1/4" from the edge.
-
Turn right side out.
-
Your project is finished! If you love this tutorial, be sure to check out Janome.com for even more inspiration.
Read NextQuilted Oven Mitt Tutorial

