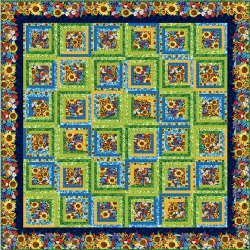
Glorious Garden Floral Quilt
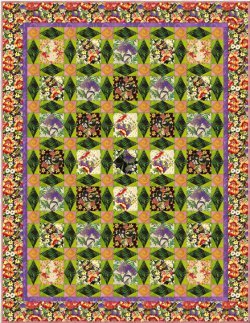
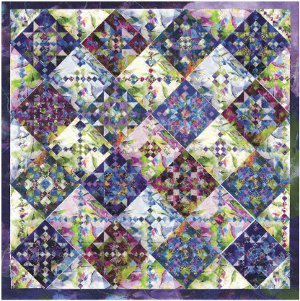
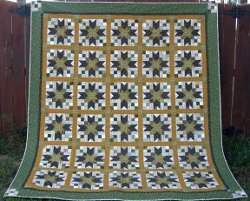
Make the Glorious Garden Floral Quilt for the nature lover or gardener in your life! The piecework in this flower garden quilt incorporates different floral prints for a patchwork garden. This quilt will luxuriantly cover a full size bed.
Project TypeMake a Project
Quilt Size80 inches wide x 104 inches long
Time to CompleteA month or more
Primary TechniquePieced

Notes:
- This pattern calls for fabric from the Glorious Garden collection by Donna Dewberry for FreeSpirit Fabrics. Fabrics are coded in materials list.
- Fabric requirements and cutting directions are based on 44" wide fabric.
MATERIALS AND CUTTING INSTRUCTIONS:
- 2-1/4 yards Fabric A (#DD41-Black) -- Cut nine 7" x 44" strips for second border; Cut eight 6-1/8" squares
- Fat Quarter Fabric B (#DD41-Tan) -- Cut four 6-1/8" squares
- 1/2 yard Fabric C (#DD42-Black) -- Cut eight 6-1/8" squares
- Fat Quarter Fabric D (#DD42-Tan) -- Cut four 6-1/8" squares
- 1/4 yard Fabric E (#DD43-Pink) -- Cut one 4-7/8" x 44" strip, then recut into eight 4-7/8" squares*
- 1/2 yard Fabric F (#DD43-Red) -- Cut two 4-7/8" x 44" strips, then recut into sixteen 4-7/8" squares*
- 5/8 yard Fabric G (#DD44-Black) -- Cut three 4-7/8" x 44" strips, then recut into eighteen 4-7/8" squares*
- 1/4 yard Fabric H (#DD44-Tan) -- Cut one 4-7/8" x 44" strip, then recut into eight 4-7/8" squares*
- 2-1/8 yards Fabric I (#DD45-Green) -- Cut twenty-eight 2-1/2" x 44" strips
- 1-1/2 yards Fabric J (#DD45-Pink) -- Cut ten 2-1/2" x 44" strips for binding
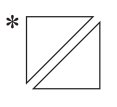
- Cut seven 2-7/8" x 44" strips, recut into ninety-six 2-7/8" squares*
- 2/3 yard Fabric K (#DD45-Purple) -- Cut nine 2" x 44" strips for first border
- 1/2 yard Fabric L (#DD45-Yellow) -- Cut four 3-3/8" x 44" strips, recut into forty-eight 3-3/8" squares
- 5/8 yard Fabric M (#DD46-Tan) -- Cut three 4-7/8" x 44" strips, then recut into twenty 4-7/8" squares*
- Fat Eighth Fabric N (#DD47-Black) -- Cut one 6-1/8" square
- 1/2 yard Fabric O (#DD47-Tan) -- Cut ten 6-1/8" squares
- 2-1/4 yards Fabric P (#DD49-Black) -- Cut seventeen 4-1/2" x 44" strips
- 7-2/3 yards fabric for backing
- 90" x 114" quilt batting
- Templates
- Template plastic
*Cut 2-7/8" and 4-7/8" squares as indicated:
INSTRUCTIONS:
Templates:
- Trace templates onto template plastic.
- Cut out and label.
Quilt Blocks:
- From the 2-1/2" x 44" Fabric I strips, cut 164 Corner Template (template right side up on right side of fabric). Cut another 164 reverse Corner Template (template right side down on right side of fabric).

- From the 4-1/2" Fabric P strips, cut 82 Diamond Templates.

- Stitch two Fabric I corner pieces and two Fabric I reverse corner pieces to each of the Fabric P diamonds.

- Stitch four Fabric J 2-7/8" half-square triangles to the sides of each of the 3-3/8" Fabric L squares.

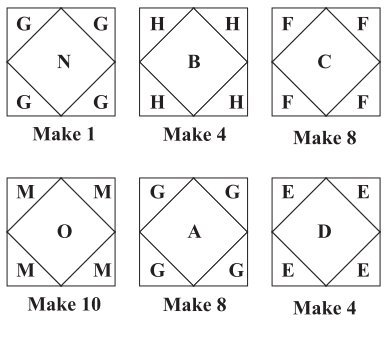
- Using the 6-1/8" squares and 4-7/8" half-square triangles, make the following number of each floral block configuration:
Assembly:
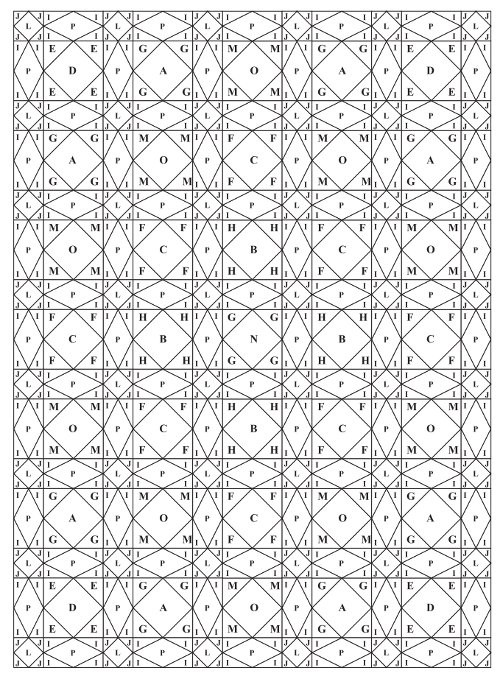
- Referring to Block Layout Diagram, lay out the blocks into fifteen horizontal rows of eleven blocks each. Stitch the blocks into rows. Sew rows together.
- Make four borders each with two 2" x 44" Fabric K strips sewn together end-to-end. Cut remaining 2" x 44" Fabric K strip into two equal lengths. Sew each half-length strip end-to-end to two of the
double-length borders. Stitch the long borders to the right and left sides of quilt center. Press and trim excess from these and all successive border additions. Add double-length borders to top and bottom of quilt.
- Make and add a 7" fabric A border in the same manner as the first border.
Finishing:
- Cut backing into three equal lengths. Sew the three lengths together along selvage edges, creating a quilt backing three fabric widths wide.
- Prepare binding from ten 2-1/2" x 44" Fabric J strips. Sew strips together into one long binding strip. Press strip in half lengthwise.
- Carefully trim backing and batting even with quilt top.
- Leaving an 8" tail of binding, sew binding to top of quilt through all layers matching all raw edges. Miter corners. Stop approximately 12" from where you started. Lay both loose ends of binding flat along quilt edge. Where these two loose ends meet, fold them back on themselves and press to form a crease. Using this crease as your stitching line, sew the two open ends of the binding together right sides together. Trim seam to 1/4" and press open. Finish sewing binding to quilt.
- Turn binding to back of quilt and blind stitch in place.
Read NextMy Blue Heaven Bed Quilt
Your Recently Viewed Projects
Linda
Jan 31, 2017
I have a quilt with this pattern, that was given to me. It's gone through alot of wear and tear, needs a bit of mending. I considered working on it without templates at my disposal. I came upon this quilt by chance. I'm so pleased, and taken aback. Yyyyyeah!
Report Inappropriate Comment
Are you sure you would like to report this comment? It will be flagged for our moderators to take action.
Thank you for taking the time to improve the content on our site.

