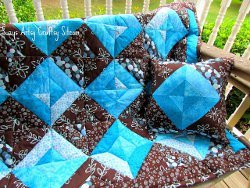
Church Picnic Quilt
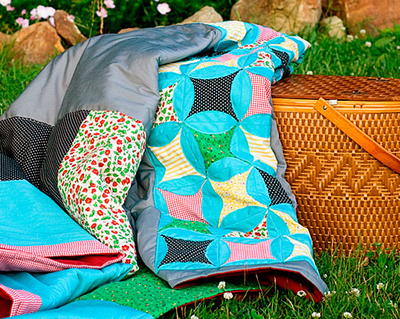
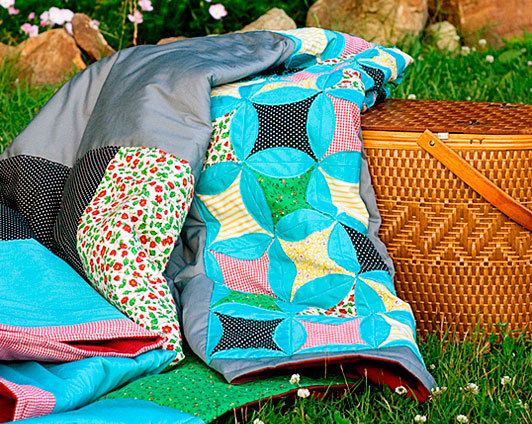 Enjoy a pleasant outing with the family with the stellar Church Picnic Quilt. This gorgeous cathedral window quilt pattern comes alive with colorful quilt fabric, but still maintains the appeal of vintage quilt patterns. Few quilts with summer theme designs are as incredible as this, so don't hesitate to give it a try. It's big enough for the whole family to enjoy on a picnic, and it's beautiful enough for you to keep around the house, as well. Summer quilting has never been more practical than with this stunning, multi-purpose quilting pattern.
Project Type: Make a Project
Time to complete: Weekend
Primary Technique: Pieced
Difficulty Level: Intermediate
If you love this free quilt pattern and tutorial, check out the rest of our new school patterns and find more modern ideas with vintage flair. You're going to love the quilts in 28 Modern Quilt Patterns and Modern Quilt Ideas.
Materials:
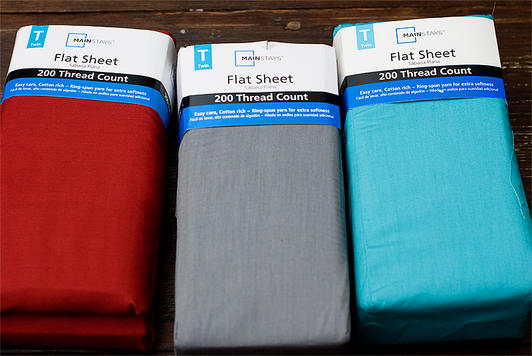 3 flat twin bed sheets
- Thread
- Quilt batting to fit between 2 twin bed sheets
- Fabric scraps and a scrap of chipboard (if creating a patchwork design)
Tools Used:
- Razor-edge Softgrip® Scissors (8")
- Crafting Rotary Paper Trimmer (12")
- Ergo Control Rotary Cutter (45 mm)
Instructions:
I wanted to have some of the charm of a cathedral window quilt but, again because of the plans I had for it, didn't want to invest all the time in making one. I found a couple of tutorials for an easy alternative that gives you a similar look. Still not wanting to invest the time in completing an entire quilt made of the squares I just did a small section in the center of the picnic blanket with them. I constructed the base of the blanket from 2 twin bed sheets and the base for the"cathedral window" squares from a third twin bed sheet.
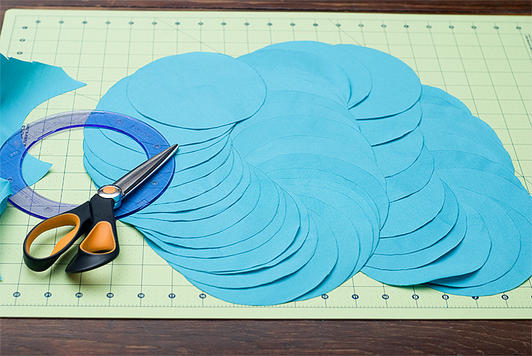
- To create the squares, begin by cutting 45 circles from a turquoise bed sheet using the 5.5 inch Fiskars Super Size Circle Template and the 8" Razor Edge Scissors.
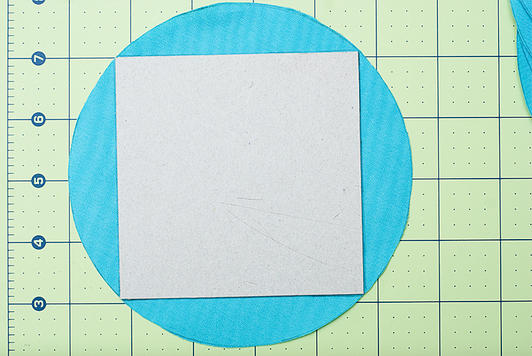
- The next step is to create a pattern for a square that just fits inside the circle. Using the Fiskars Desktop Rotary Trimmer, cut a square, from chipboard, that is slightly under 4 inches . Use this to trace a square in the center of each circle. The intersections of the square should not rest outside the edge of the circle.
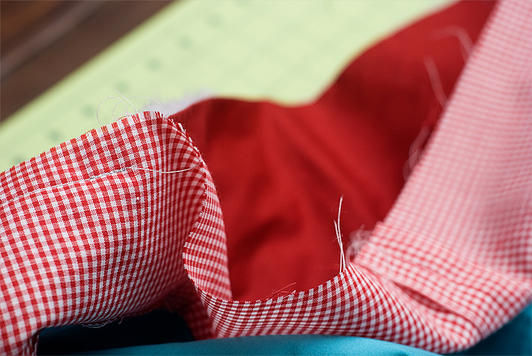
- Pinning the pieces together properly takes a bit of time but is necessary for everything lining up properly in the end. Using the grid on the18 inch by 24 inch cutting mat, align the traced lines on one circle (face down) with the lines on the mat. This is easiest to do by folding back the top and bottom of the circles as seen in this photo and sliding the circle around until they are aligned with the grid.
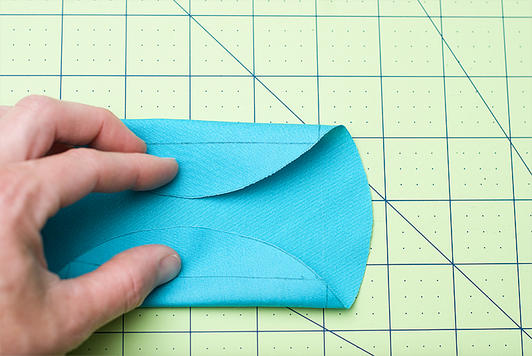
- Lay a second circle on top of the first circle, again aligning the traced lines with those on the mat. The lines on the two circles are now aligned. Pin the circles together.
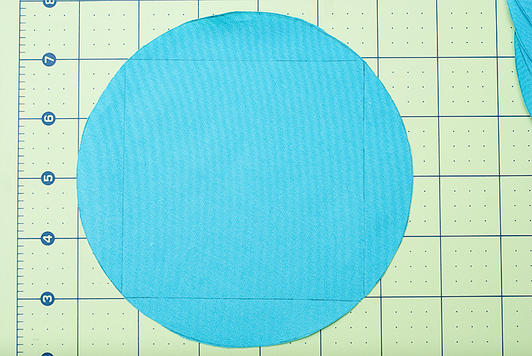
- Stitch along the traced line.
- Open the circles and press the seam flat.
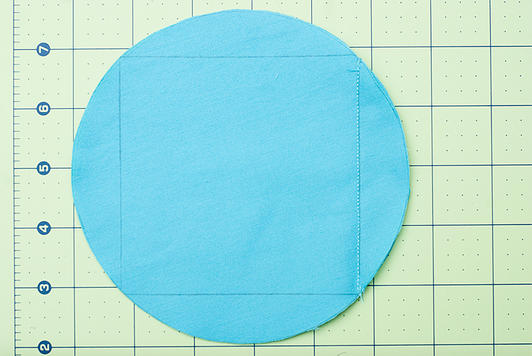
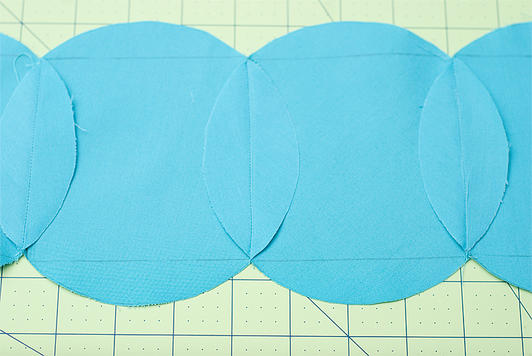
- You'll create a strip that looks like this.
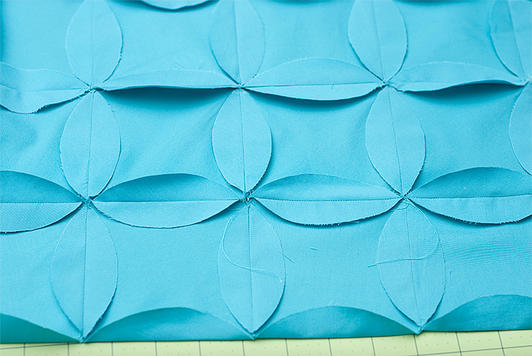
- And then you'll sew the strips together to make a section that looks like this.
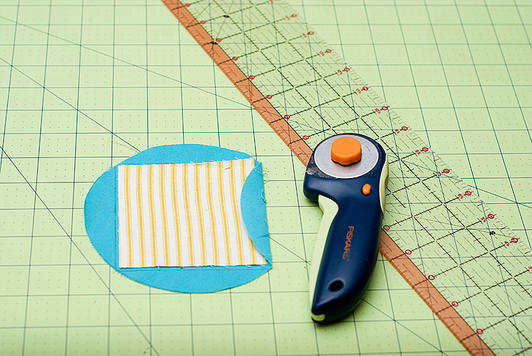
- Using the 45mm Comfort Grip Rotary Cutter and the 3.5 inch x 18.5 inch Acrylic Ruler, cut 45 squares, measuring 4 7/8 inch, from a variety of fabric scraps. Center them in the circles, under the flaps, and then stitch them in place by sewing along the curved edges of each flap. I want my picnic blanket to look worn so I used a straight stitch which will allow the edges to fray. You can use a zig-zag stitch over the edges, instead, to prevent fraying.
- If you're going to make a complete quilt from these squares, you can add a square of quilt batting under each square of fabric.
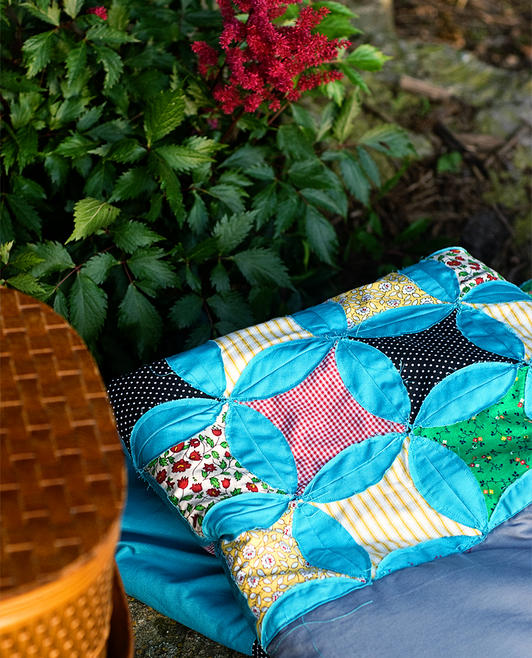
When attached to the picnic blanket at a later stage, your completed panel of circles will look like this!
- Now you can finish the picnic blanket by taking two twin size flat sheets and a layer of quilt batting and layering them quilt batting, bottom sheet (right-side up) on top of that, top sheet (right-side down) on top of that. Pin all the layers together around the perimeter. Make sure to smooth all the layers out before pinning. Sheets aren't always square so don't just align the edges. You may have to do some trimming along the edges.
- Stitch around the perimeter, reverse stitching at the beginning and end of your stitching and leaving a 12 inch turning opening. Slipstitch the turning opening closed. Next, topstitch around the perimeter of the blanket, 1/2 inch from the edge. If you want your thread to match both your top and bottom layers, use a color to coordinate with the top to thread the machine and a color to coordinate with the bottom in your bobbin.
- Center the panel of patchwork circles in the center of the quilt, pin it through all 3 layers (lots of pins to help keep it from shifting during stitching!) of the blanket and stitch around the perimeter of the panel.
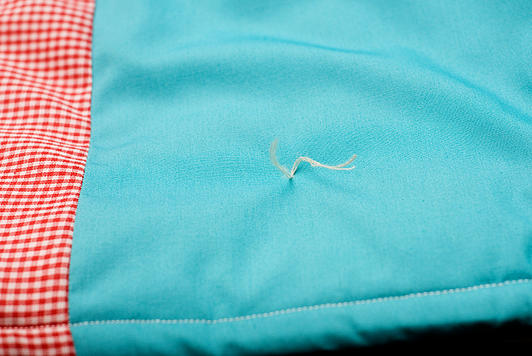
- At this point, you can either machine stitch a simple pattern (a grid or straight lines, evenly spaced will work) over the picnic blanket to hold the layers together. Or you can "tie" it by using embroidery floss to create stitches to hold the layers together. Simply insert a threaded needle through all 3 layers of the picnic blanket, push the needle back up through all three layers right next to the point where the needle came through the back side, and tie the two lengths of floss in a knot, cutting them to leave 2 tails. Do this in a grid pattern over the entire picnic blanket.
- If you want to add more of a patchwork look to your picnic blanket as I did, prior to layering and stitching the top, bottom, and batting together, you'll need to replace part of your top sheet. I used scraps of material left over from other projects and some fabric I got at a yard sale for next to nothing. You'll cut panels to the desired sizes, keeping in mind the width of them when pieced together can't be wider than your top sheet. Make sure you allow an extra 1/2 inch on each side of your panels as you're cutting them for seam allowances.
- Once you have your panels all sewn together, measure the panel from top to bottom. This measurement, minus 1 inch to make up for seam allowances, is the amount you'll cut from the top sheet. You'll do this for both ends of the picnic blanket. Pin and stitch the panels to what is left of the top sheet using a 1/2 inch seam allowance. From this point, assemble the picnic blanket starting at the above step where you layer the top and bottom sheets and quilt batting.
- To hold together the layers of a picnic blanket pieced together this way, you can simply top stitch right next to the seams of the pieced panels or use one of the methods described in the above steps.
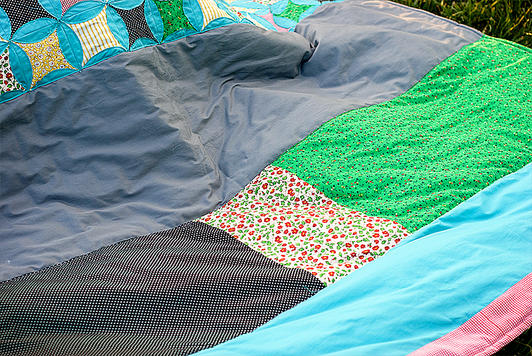
When finished, I had a picnic blanket for a right around $25! And that low cost for adding some of the charm of an old quilt makes me believe my picnic days will now be even more relaxing.
Read NextSummer Garden Quilt
Your Recently Viewed Projects
Tammy
Feb 27, 2017
I love the cathedral windows pattern. This is a very bold quilt and it is charming. Most of the ones I have seen were much more subdued in colors. I saw a pattern once of a rag quilt that was cathedral windows, but lost the link to it and have not been able to find it again. This pattern would make a great gift for anyone. Perfect for family use!
Member 3591572
Oct 24, 2017
You do the same thing , if you want it to fry then use straight stitch, if you are using batting or flannel you sew an x on top of the square through all of the fabrics, most instructions have you do a row at a time, this has you do the whole back and then add the squares, you get the same results. Just less material to hold on to.
q8Lorraine 1974453
Jun 30, 2014
Step #7 and #8 don't tell us how many circles are sewn in a strip or how many rows to make. Does anyone know?
skutovr
Nov 02, 2013
Squares in Step 9 should be cut 3 7/8" rather than the 4 7/8" indicated in the directions.
donnafleming1983 7 320620
Sep 13, 2013
Can you make a Queen sized quilt by using Queen sized sheets and just making more squares.
clmcgraw 0892103
Jul 24, 2013
I would name this quilt "Playful Ocean Dancing". It reminds me of being lighthearted and carefree in summer!
oldkauaikuuipo 726 7571
Jul 24, 2013
Name that quilt: Turquoise Somersaults I love the colors.
condomimi 1566037
Jul 23, 2013
I just finished a quilt just like this one and I made mine out of scraps, so I ended up naming mine a " Quilt of Many Colors".
darlenekrystal 072 6899
Jul 23, 2013
Bursting Blues Window Quilt...awesome pattern...I think I just learnt how to make a cathedral window....I'm going to try a pillow size for a beginning block size.....thanks....
jones8597 3310750
Jul 23, 2013
I entered anyway because I thought "what if its a typo" silly me
evelyn5623 7170534
Jul 23, 2013
Quilt name, "Stained Glass". Love the directions, so clear and easy to follow. Thank you.
sewsome
Jul 23, 2013
OR... how about removing the whole contest thing after it's over for those of us who didn't read all the way through and seeing that it was over on June 26.
pdoylemikrut 54751 47
Jul 22, 2013
my title is Hyro- Gyro.......I see the movement of gyro scopes.
Mizu
Jul 22, 2013
Ambitious project! I would call it "Blue Skies for Picnicking" Looks lovely.
cwwcaw 0101430
Jul 22, 2013
looks like a great picnic quilt - when looking at the picture it reminds me a kites floating in the sky at the beach - so my name would be kites in the sky
JaniacRenee
Jul 22, 2013
A New Star is Born.... I've made one with 12 inches squares... very easy and nice look
Report Inappropriate Comment
Are you sure you would like to report this comment? It will be flagged for our moderators to take action.
Thank you for taking the time to improve the content on our site.

